


Congratulations to Javier Sotomayor, November 2023 PFRE Photographer of the Month! The theme this month was "Open." Javier Sotomayor - Entry #879 Dave Koch - Entry #877 Peter Wingfield - Entry #874 Here's what Javier has to say: Hello First of all I wa ...


As an Amazon Associate we earn from qualifying purchases.
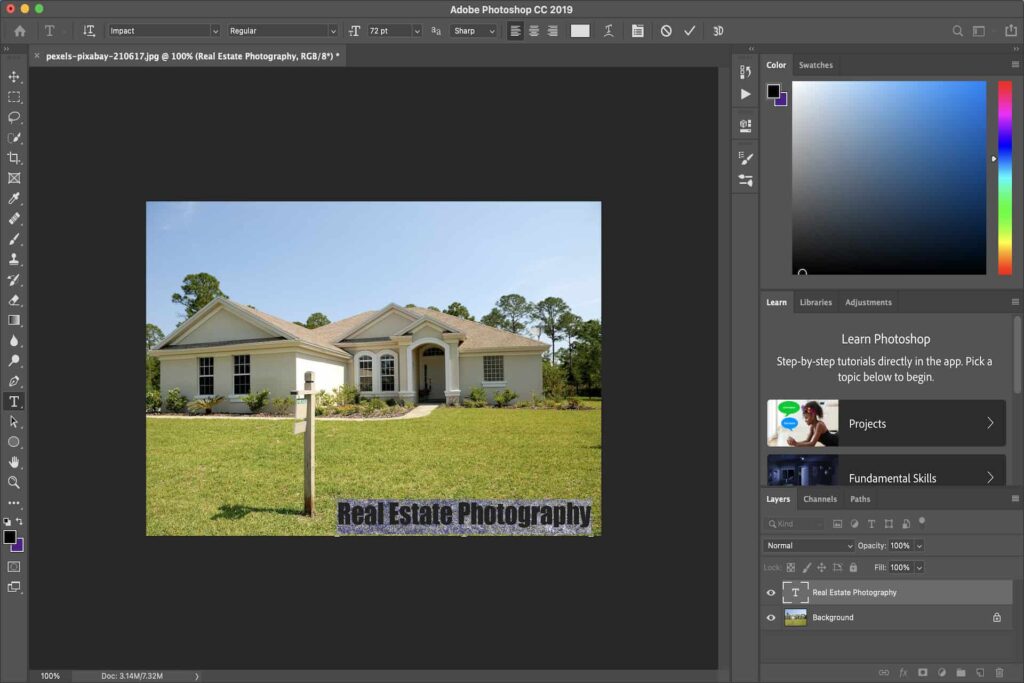
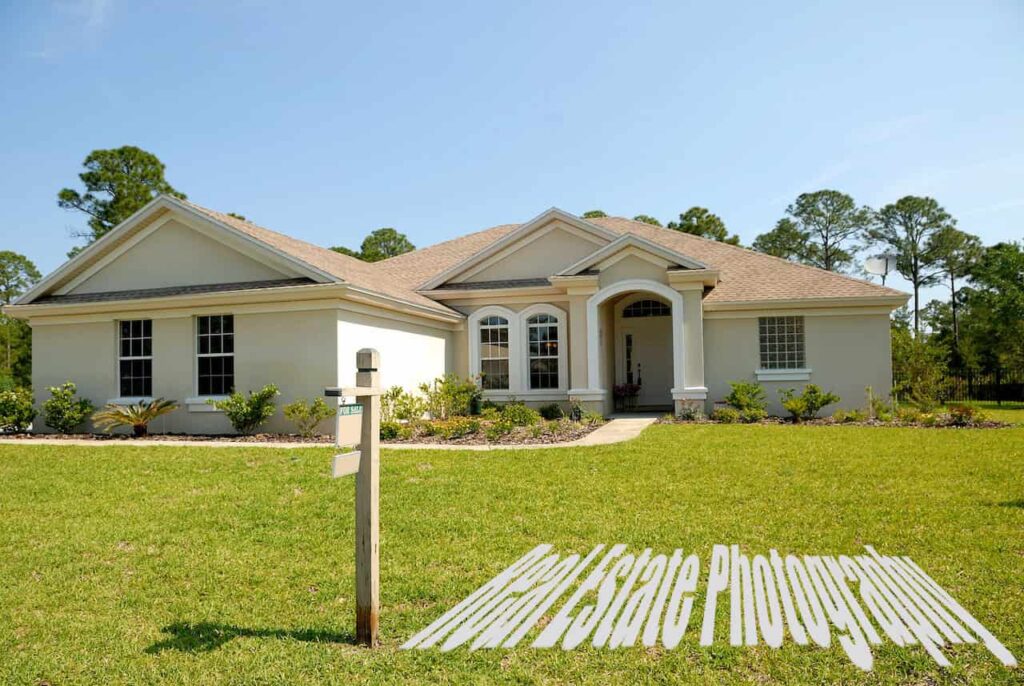
Most real estate interiors look almost the same, and there are chances of the viewers getting confused about which photo is for which property. Learning how to edit text in Photoshop can help you caption your real estate photos to provide descriptions, emphasize details and make them unique.
Quick Navigation
Although Photoshop is a photo-editing software, it comes with advanced text-editing capabilities, allowing you to add, edit and distort text just like an advanced text editor. However, you might only be able to edit the text if you have not flattened the text layer.
Usually, flattening or rastering text by combining it with other layers or by using tools and applying effects such as filters changes it to pixels. That means the text will become an image or part of an image, and you can’t edit it.

A rasterized layer is a normal layer and will show a smaller version of the image as a highlight on the left-hand side of the layer. However, if your text layer is not yet rasterized and converted to pixels, you can use the following steps to edit it.

If you are adding text on your real estate images to provide descriptions on the main subject or you want to create a text image with a unique background, it means you will be working with an image and text.
Keeping in mind that Photoshop is not a text editor, you might not be able to manipulate the text the same way you manipulate the image. As a result, Photoshop allows you to add and edit the text using a separate unique layer, the Text layer.
Unlike the other layers in Photoshop, the properties of a Text layer are more of a text editor such as Microsoft word. Locate the text layer containing the text to edit on the lower right-hand side of the interface. Usually, this layer will show a large T on the left-hand side of the highlight.

Generally, a text layer is editable, and you can use the Type tool to edit the text the same way you use it to create text. Pick the Type tool from the tools panel located on the left-hand side of the interface or press the keyboard shortcut key T. Usually, this tool is indicated with a T icon.
Depending on the text you are editing, you can choose the horizontal or the vertical type tool. Since the horizontal type tool is the default option, clicking the T box will select it. This tool allows you to enter the text from left to right.
On the other hand, the vertical type tool allows you to enter the text from top to bottom. You can pick the vertical type tool by right-clicking on the T box and choosing the vertical type option rather than the horizontal type.
Depending on the length of the text you are editing, the most speedy way to edit the text is to highlight it so you can delete or apply changes to the entire selection. You can use the following tips to modify a section or entire text rather than editing individual characters.
If you are editing and adding text from another file, it can be time-consuming and tedious to manually type the text. Fortunately, Photoshop is compatible with most text files such as web pages, Photoshop files (PSD), PDF files, and Microsoft Word, and you can copy and paste the text using the following steps.

After editing the text, you will need to rasterize it to change it to pixels. Usually, this will make the text layer to be like the normal image layers, allowing you to distort the text and create unique transformations.

In most cases, this is the best way to caption your real estate photos, as people might not be able to recreate the distortions. Navigate to the layers panel, right-click on the text layer you have edited, and then choose Rasterize. Usually, the T icon on the layer highlight will change to a white and gray checkerboard.
Navigate to Edit, hover the mouse over the Transform option and then select Distort. You can then drag the borders of the white box that surrounds the text to create distortions. Once satisfied with the edits and distortions, hit the Enter key to remove the box and borders.

You can save your text as an image by navigating to File, choosing Save As, selecting JPEG as your preferred file format, and then choosing Save. When Photoshop asks you whether you want to discard layers, choose OK or Yes.
Usually, this will make your text an uneditable JPEG image that can be opened by any photo viewer. However, if you plan to edit the text in the future, it is advisable to save it as a Photoshop PSD document without rasterizing.
You can remove text from an image in Photoshop by making a selection of the text objects and cutting them from the image. You can then restore the background of the image using the Content-Aware Fill tool. You can try to make the adjustments more realistic and natural using the Sampling Brush Tool.
Yes, you can print text from Photoshop. However, Photoshop doesn’t send vector data to the printer, and there are high chances of your text becoming pixelated and low-quality if you try to scale up when printing.
You can edit the text in Photoshop using the Type tool on a text layer that is not yet rasterized. Learning how to edit the text in Photoshop allows you to copy and paste the text from another text editor or highlight a wall of text and make changes at once.


