PFRE is the original online resource for real estate and interior photographers. Since 2006, it has been a community hub where like-minded professionals from around the world gather to share information with a common goal of improving their work and advancing their business. With thousands of articles, covering hundreds of topics, PFRE offers the most robust collection of educational material in our field. The history of real estate photography has been documented within these pages.
Congratulations to Javier Sotomayor, November 2023 PFRE Photographer of the Month! The theme this month was "Open." Javier Sotomayor - Entry #879 Dave Koch - Entry #877 Peter Wingfield - Entry #874 Here's what Javier has to say: Hello First of all I wa ...
For over a decade, photographers from around the world have participated in PFRE’s monthly photography contests, culminating in the year-end crowning of PFRE’s Photographer of the Year. With a new theme each month and commentary offered by some of the finest real estate & interior photographers anywhere, these contests offer a fun, competitive environment with rich learning opportunities.
PFRE prides itself on the depth and breadth of the information and professional development resources it makes available to our community. Our goal is to help real estate and interior photographers be successful while bringing the community together and elevating the industry as a whole.
As an Amazon Associate we earn from qualifying purchases.
Wrinkled clothes can look messy and distracting. Sometimes, a real estate photography client may appear for a headshot session wearing unironed clothes. Here is a complete guide on the different ways how to remove clothing wrinkles in Photoshop.
You can use the Spot Healing, Healing Brush, Clone Stamp, Patch, and Smudge tools to eliminate clothing wrinkles in Photoshop. Working on the frequency settings is a more advanced technique. Most of these tools will require you to make selections and pull pixels from the surrounding areas to cover the creases.
Various editing tools in Photoshop can help you take out unwanted wrinkles in clothing. You may use any of them in certain situations, especially if they can speed up your editing.
Using the Spot Healing Brush Tool
The Spot Healing Brush is one of the easiest tools to remove wrinkles in clothing. It's a quick-fix tool that chooses the best pixels from the surrounding parts that match the lighting and colors of the pixels being healed. In addition, it provides more control by letting you work on isolated wrinkles.
Set the Painting Mode to Lighten if the crease color is darker than the fabric around it so you can brighten the wrinkles.
Opt for Screen if you need to create a clean ironed effect. Choose Replace to retain the fabric's texture while making the healing effect appear more natural.
The Content-Aware is the best Healing Type in most cases because it replicates the sample area's content and texture. Thus, it can serve as an auto-wrinkle remover.
Set the Brush Size to 200 px, while 70% is a good starting point for the Hardness. Next, bring the Spacing up to 25% to cover the prominent wrinkles.
Zoom in and brush over the wrinkled area. Click and drag to paint over the prominent first. Observe as Photoshop finds similar pixels to replace the brush strokes and remove the creases.
Using the Healing Brush Tool
The Healing Brush is another tool that can remove creases in clothing easily. Although it works quite similarly to the Spot Healing Brush, this one gives more control in selecting the pixels from the sample area; instead of letting Photoshop do it.
Click on the Healing Brush tool from the left toolbar.
Like the first method, you can set the Mode to Lighten if the wrinkles are darker than the fabric around it. Meanwhile, opt for Darken if the creases are lighter.
Decrease or increase the brush's Size depending on the area you want to fix.
Hold the Alt/Option key while clicking to choose the area you'd like to sample the pixels.
Once you have the sample set, paint over the wrinkles to remove them.
Choose Lighten or Darken for the Mode, depending on the color of the creases.
Adjust the brush's Size, Flow, and Opacity depending on the area you need to edit.
Hold down Alt/Control and click to select a sample area for the clone. It's best to get a sample of an area with similar colors or textures.
With the sample set, click and drag over the creases to remove them.
Using the Patch Tool
Another way to fix wrinkled clothing in Photoshop is to use the Patch tool. This tool allows you to draw a selection and drag the area to new pixels you'd like to replace it with.
It's a great tool for smoothing larger areas, mainly if you need help matching the surrounding colors.
Press the J key to open the Healing Brush tool. Next, press the Shift key and the shortcut letter to toggle between the Healing Brush and Patch tools.
With the Patch tool activated, click and drag the selection to a part of the photo you can use as the source.
Release the selection and check how Photoshop will automatically match the lighting.
Continue clicking and dragging the selection until you've smoothed out the creases.
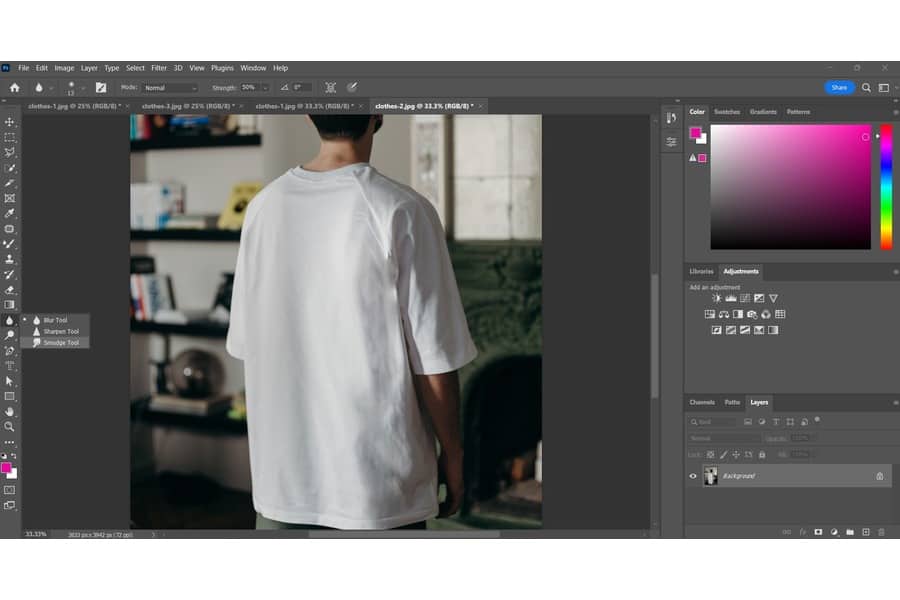
Using the Smudge Tool
Wrinkled clothes can send a message that you're a sloppy dresser. Particularly for jobs where a person has to face people, like real estate agents, it's important to dress properly to avoid giving your company or yourself a bad look.
The Smudge tool is perfect for removing wrinkles and reshaping edges to create a smoother texture on clothes.
Click on the pointing finger icon in the Photoshop toolbox. Alternatively, press Shift + R to open the Smudge tool.
Set the Size to a fairly small size.
Zoom in, then click and hold down the mouse button on one side of the crease you want to remove.
Hold down the Shift button and drag the cursor across the wrinkle.
Keep dragging until you eliminate the wrinkles in the clothes.
Using Frequency Separation
Frequency separation is an editing technique that separates color information from other details in a photo. While this is a more complicated process, it lets you alter colors and details independently.
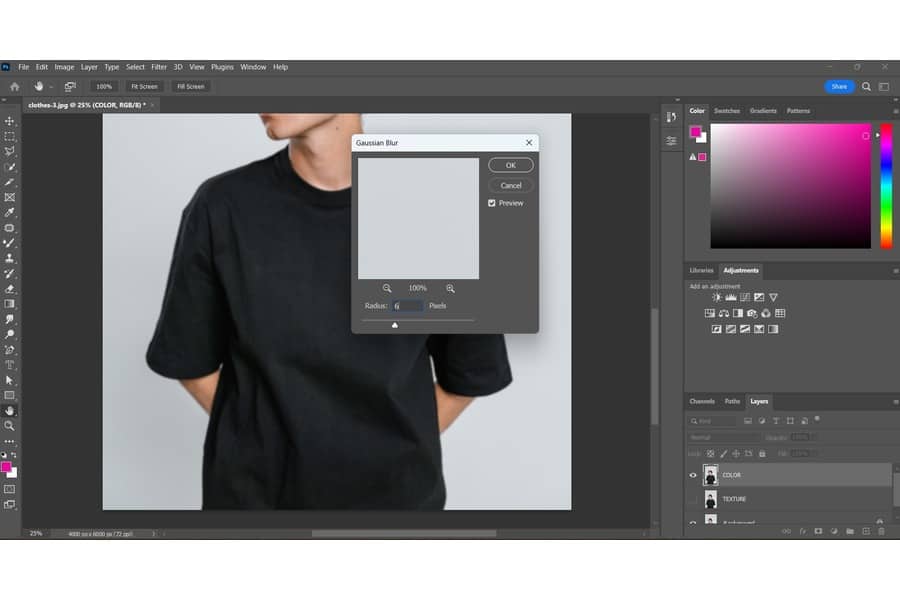
Work on the Color Layer
Select the layer, then press Ctrl/Command + J to duplicate it. Do this twice to create two copies. Rename the top layer as Texture and the middle layer as Color.
Click the eyeball icon next to the top layer. This should hide the Texture layer. Select the middle layer, the one you renamed Color.
Go to the top toolbar, click Filter, expand the Blur options, and choose Gaussian Blur.
Move the slider to around six pixels to increase the blur effect. Click OK.
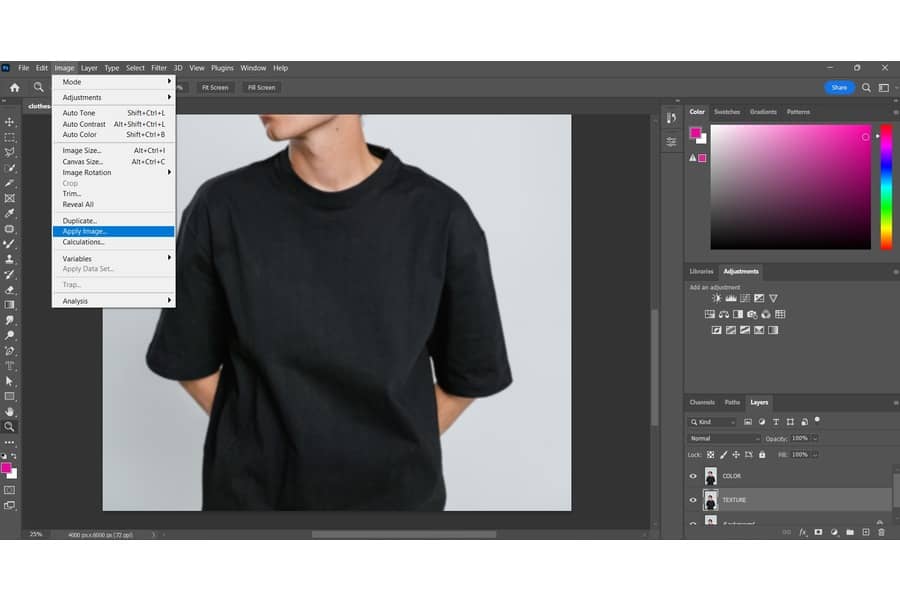
Tap the eye icon of the Texture layer to reveal it. Then, with the Texture layer selected in the layers panel, head to the top toolbar, click on Image, and select Apply Image.
Blend With the Other Layers
Expand the drop-down menu next to the Layer setting. Choose the Color layer.
Choose Subtract for the Blending Mode. This will eliminate what remains of the layer, including the dark and light details of the creases.
Set the Opacity value to 100, Scale level to 2, and Offset value to 128. Click OK.
If the photo turns gray, go to the Layers panel and select the Texture layer.
From the Blending Mode drop-down box, change it from Normal to Linear Light.
Return to the Color layer. Next, press the L key to open the Lasso tool.
Increase the Feather value between 10px to 30px to blend the area around the wrinkle properly.
With the Lasso tool active, click and drag to make a selection around the creases.
Go to Filter, expand the Blur options, and click on Gaussian Blur.
Increase the blur effect on the part of the creases until there's no shadow left. Click OK.
Press Ctrl/Command + D to deselect the active Lasso selection.
Continue using the Lasso tool to repeat the process on every wrinkle you want to blur.
Related Questions
What Are the Challenges of Removing Clothing Wrinkles in Photoshop?
When editing in Photoshop, the main challenge of removing creases in clothes is that you may accidentally create patterns. For example, the Clone Stamp and Healing Brush tools may alter the fabric's texture and design.
How Do You Remove Clothing Stains in Photoshop?
Like removing wrinkles in Photoshop, you can use the Spot Healing Brush tool to eliminate clothing stains or smudges. Use the Brush to cover the entire area with a single click.
How to Add Clothing Wrinkles in Photoshop?
You can use the Rectangular Marquee and Gradient tools to add wrinkles to your clothes. The Rectangular Marquee drags a selection to form the folds. Meanwhile, the Gradient tool creates the texture and color of the wrinkles.
Conclusion
When editing in Photoshop, you can use the Spot Healing Brush, Clone Stamp, Healing Brush, Patch, and Smudge tools to remove wrinkles in clothes. Once you find the technique that works for your editing process, you won't have to worry about wrinkled clothes in your photos.
Learn 50+ free tips to apply during your next shoot!
Thank you!
Check your inbox shortly to access the 53 tips to help with your real estate photos.
This site uses cookies. By continuing to browse you are agreeing to our use of cookies both necessary cookies to make our site work and analytic cookies to help us improve our website. Click here to learn more about our privacy policy.