


Congratulations to Javier Sotomayor, November 2023 PFRE Photographer of the Month! The theme this month was "Open." Javier Sotomayor - Entry #879 Dave Koch - Entry #877 Peter Wingfield - Entry #874 Here's what Javier has to say: Hello First of all I wa ...


As an Amazon Associate we earn from qualifying purchases.
You can use GIFs to illustrate certain aspects of a real estate property, such as a 3D tour of the compound. Knowing how to edit a GIF in Photoshop can help you add different filters and effects without getting additional image manipulation or video editing software.
Quick Navigation
GIF, which stands for Graphics Interchange Format, is an image file format you can primarily use for short animations and looping images online. GIFs use lossless compression, which means they can be compressed without losing image quality.
Generally, you can use a GIF to share funny and relatable moments or reactions about a real estate property on social media or blogs.

Since GIFs are made of frames like a video file, Photoshop provides a wide range of tools and features you can use to modify and enhance them, including adjusting brightness and contrast and applying filters and effects using the following steps.
Navigate to the location where the GIF file is saved on your computer, select it, and click on Open at the bottom right corner of the window. When opening the normal images, you can use the shortcut Ctrl + O on Windows and Command + O on Mac.

If you want to resize your GIF file before manipulating the actual frames, you can do it the same way you resize a still photo. Click on the Image menu in the top menu bar and select Image Size from the drop-down menu.
A pop-up menu will appear with the current dimensions of the image, as well as options for changing its size. Ensure that the Constrain Proportions option is checked, and then change the width or height of the image by adjusting the values in the Width or Height fields.
Alternatively, you can adjust the size of the GIF by a certain percentage by changing the value in the Percent field. Once satisfied, click the OK button to apply the new changes to the GIF.

Timeline in Photoshop is a panel that allows you to create animations from your still images or videos by combining several layers or animations. The timeline panel gives you control over the properties of the animation, such as the duration, playback speed, and looping options.
The advantage of the Photoshop timeline panel is that it allows you to view and edit video layers just like normal image layers when adding Gaussian blur or removing watermarks.

The adjustment layers create a separate layer that can edit the color, contrast, brightness, hue, or saturation of the layers beneath it without actually changing the original pixels of that layer.
This allows you to apply global adjustments to your GIF frames, such as enhancing the colors of the interior painting of the real estate interiors featured in the GIF file.
Navigate to the highest point of the Layers panel, pick out the topmost frame, which is usually displayed above all other layers, and apply the adjustment layer. Doing this will cause the effect to affect all the layers and frames positioned beneath it.


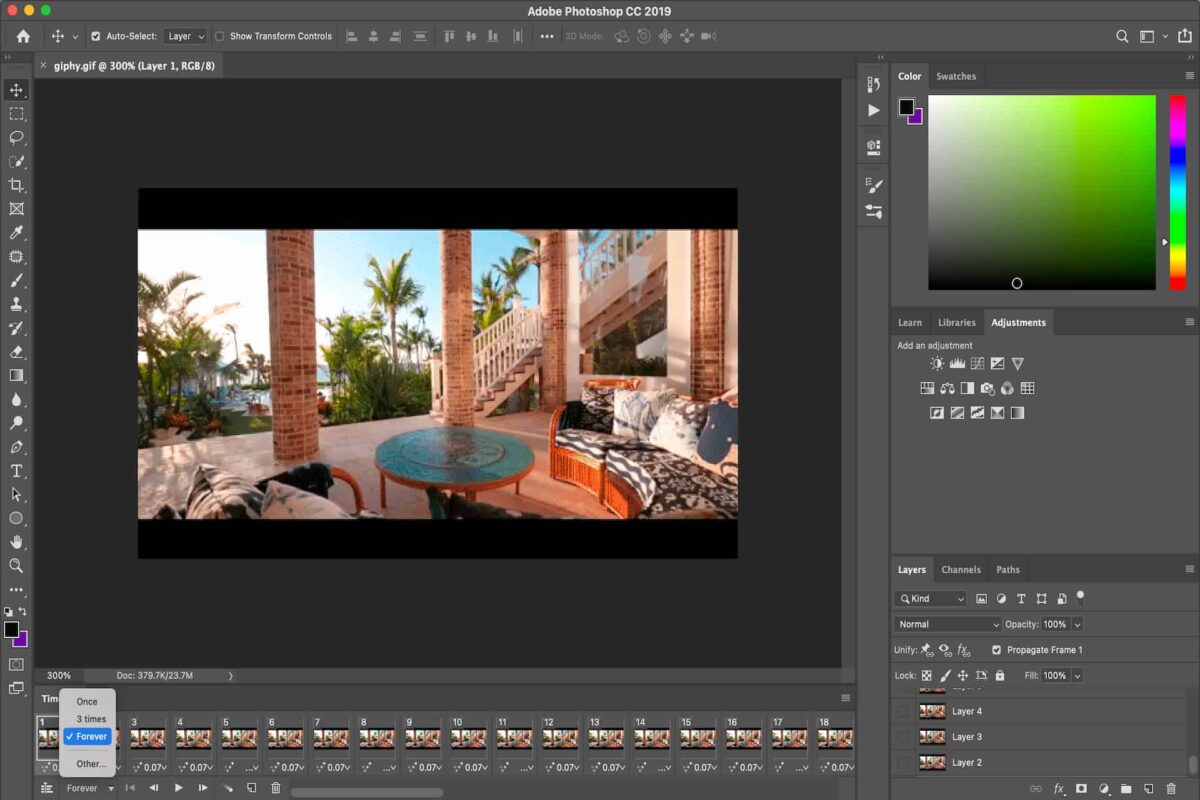
In GIFs, a loop refers to the number of times the sequence of images will repeat itself before stopping. A GIF loop is a setting that determines whether the animation will play once and then stop or continue indefinitely until the viewer closes the file or stops it manually.
Most GIFs have the loop set to infinite, which means that they will repeat indefinitely until the viewer closes the file. However, you can limit the number of loops, usually by setting a specific number such as 3, 5, or 10.
Simply change the GIF looping setting from the drop-down menu located at the lower part of the timeline window. Since you will likely want the GIF to run on an infinite loop, choose the Forever option.
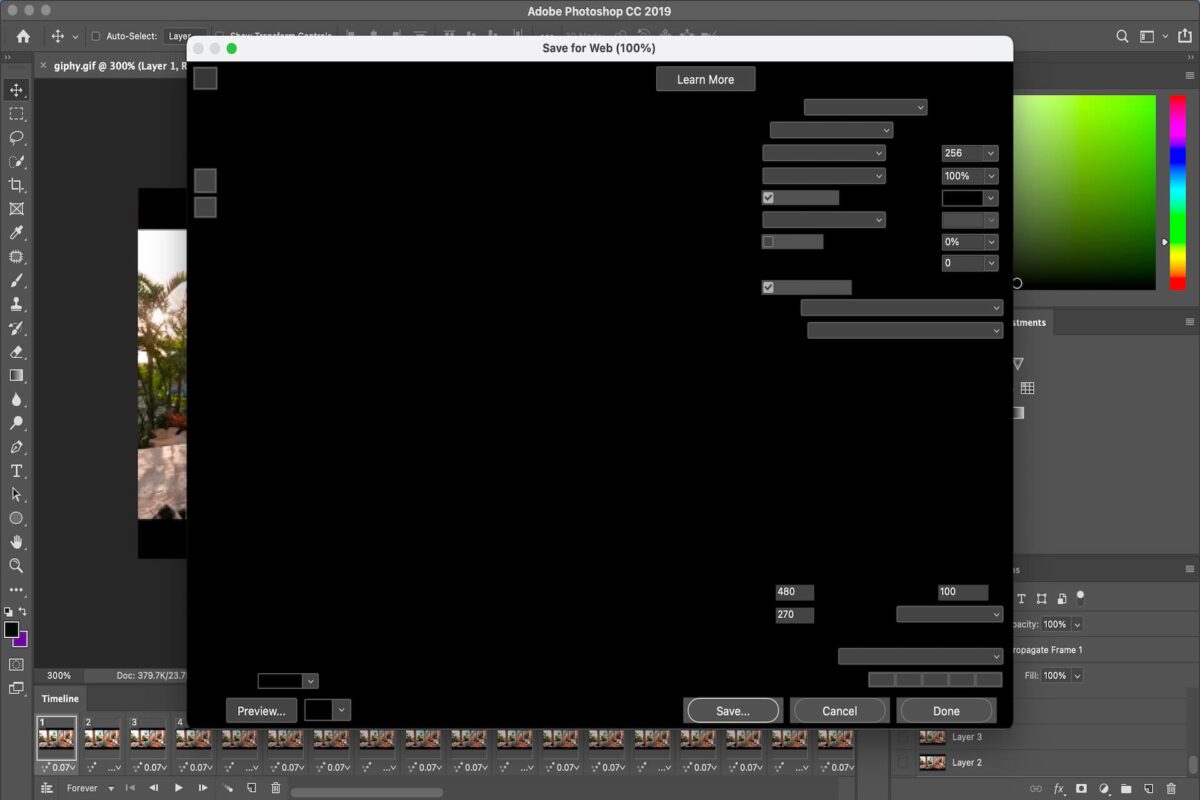
Save for Web (Legacy) is an option for exporting images in a web-friendly format such as GIF, JPEG, and PNG-8.
Although this option has been replaced with more advanced and powerful options such as Export As, Export, and Quick Export, which provide more features and flexibility, it still remains a useful option for creating lightweight, web-optimized images and GIFs.
Before exporting, you need to highlight all the frames so you don't export a single frame and end up with one lower-resolution photo, like one shot by a micro-four-third camera with high ISO in dark interiors.
Yes, you can add text to a GIF in Photoshop using the same criteria as adding the adjustment layers. Simply select the last frame where you want the text to appear, and then add a text layer. Like the adjustment layers, the text will be visible in the frames beneath it.
No, a GIF is not the same as a video. A GIF is a series of still images or frames that are combined to create an animated image, which usually loops endlessly. On the other hand, a video is a series of moving images, typically with sound, that plays as a continuous stream.
GIFs tend to have smaller file sizes, usually under 600KB. However, the file size of a GIF can vary widely depending on several factors, including the dimensions of the image, the number of frames or images in the animation, and the level of detail and color in each frame.
Learning how to edit a GIF in Photoshop helps you to incorporate GIFs in your collection of real estate photos and videos to enhance property descriptions. Simply open the GIF in Photoshop and edit the different frames using the timeline panel.


