


Congratulations to Javier Sotomayor, November 2023 PFRE Photographer of the Month! The theme this month was "Open." Javier Sotomayor - Entry #879 Dave Koch - Entry #877 Peter Wingfield - Entry #874 Here's what Javier has to say: Hello First of all I wa ...


As an Amazon Associate we earn from qualifying purchases.
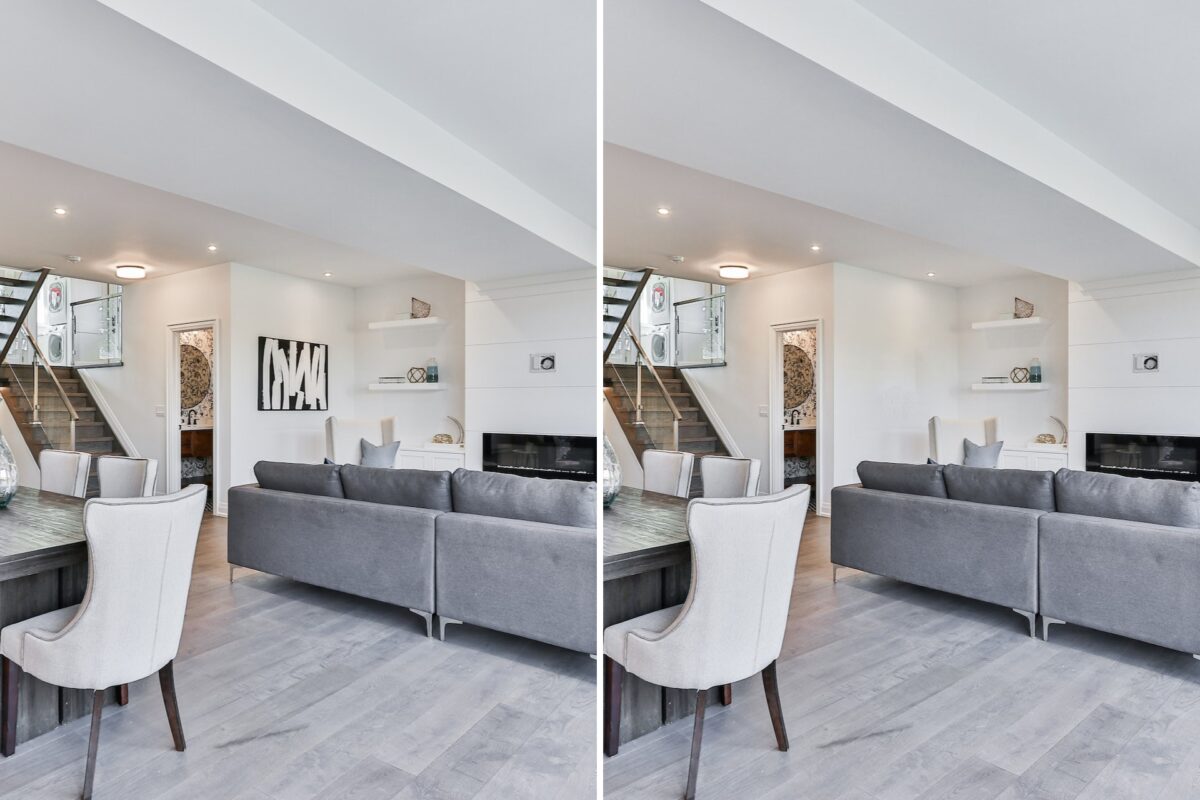
You might not avoid capturing background objects, whether a beginner or a professional photographer, especially when shooting with wide-angle lenses. Learning how to delete objects in Photoshop can help you eliminate these unnecessary objects that might distract the viewers.
Quick Navigation
Even with the best composition, there are still chances of capturing unwanted elements and objects. Usually, these objects clutter the photo, and the viewer might miss the target subject. For instance, the viewer might focus on a bird in a real estate exterior backyard rather than focusing on the property.
These objects form part of the image pixels, and you need to replace them with other blending pixels to make the photo look natural. Fortunately, Photoshop is an advanced application that lets you remove unwanted objects during the post-processing phase using the following steps.

Open the image in Photoshop by navigating to File and then selecting Open. This will open the File Explorer window if you use a Windows PC or Finder if you use a Mac. Locate the image folder and double-click on the image to edit.

Usually, the image will open in Photoshop as the background layer. Go to the layers panel, right-click on the background layer and then click Duplicate Layer. Alternatively, use the keyboard shortcut Command + J if you use a Mac or Control + J if you use a Windows OS.
Duplicating the layer lets you save the original image, giving you a backup in case you mess with the duplicated layer. Depending on the complexity of the image, you can use one of the following tools to delete an object in your image.

As the name suggests, the clone stamp tool uses the pixels of another area in your image to hide the pixels of the object you want to delete. The clone tool replaces pixels rather than blending them like the healing brush.
As a result, the clone stamp tool works best when the area you want to replace is of the same tone and color as the sample area. Fortunately, the tool uses a live view that lets you select the best pixels to take from.
However, this method might not work well when deleting objects on complex backgrounds, such as images with repeating textures and patterns. Regardless of the Photoshop version, you can use the following steps to delete objects using the Clone Stamp tool.

The Content-Aware Fill is one of Photoshop's features specifically designed to make removing objects as straightforward as possible. Typically, you only need to select the object you want to remove, and Photoshop will use artificial intelligence to sample the surroundings and decide the best pixels to replace with.

Like the Content-Aware Fill, the Spot Healing brush is another straightforward method to delete objects. However, this option is designed to remove small objects or spots, such as wall peelings, that can ruin your real estate interior photos.
Since the Spot Healing brush is meant for small spots, you might need to zoom in on the image to see the object you are removing clearly. Simply click on the magnifying glass and then click on the workspace to zoom in, or hit the keyboard keys Control (Command) and (+) or Control (Command) and minus (-) to zoom in and out.
Pick the Spot Healing brush from the left toolbar. In the options bar that appears, locate the size slider and adjust the brush size to make it slightly larger than the spot you want to remove. Choose the Content-Aware option, enable the Sample All layers option, and then click on the object.


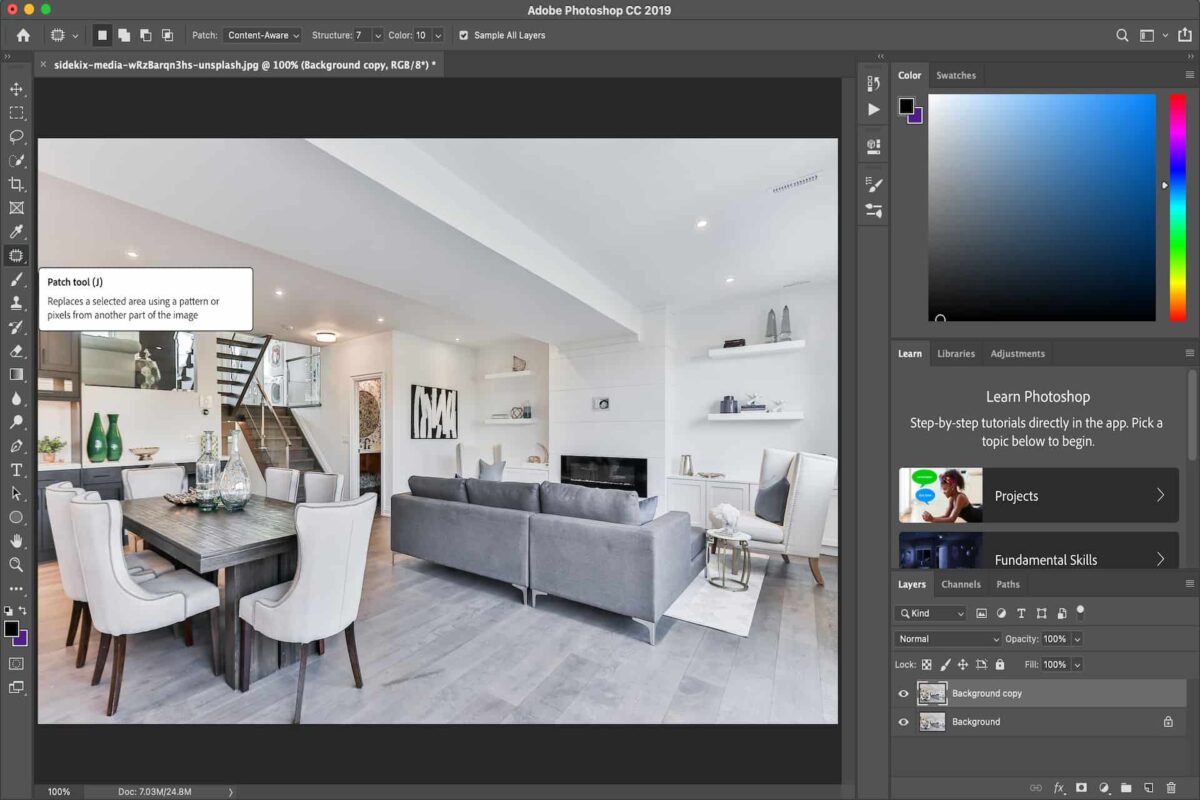
The Patch tool is one of the healing tools in Photoshop that helps to repair damaged photos. Like the Spot Healing brush, you can use this tool to remove unwanted elements or objects in the photo. Unlike the Spot Healing option, which works by brushing on the object, the Patch tool works by selecting the object.
Pick the patch tool from the left-hand menu or click on the Healing Brush option and then choose it from the drop-down menu. Alternatively, you can press the J key on your keyboard. Make a selection around the object you want to delete, the same way you make a selection using the lasso tool.
When a line of marching ants forms, click in the center of the selection and drag it to the region you want to source the pixels. Usually, Photoshop will replace the destination with pixels from the source when you release the mouse. Deselect by hitting Control + D on a Windows computer or Command + D on Mac.
You can move an object in Photoshop using the Photoshop Move tool by cutting the pixels of the object and dragging them to a new location. Activate the Move tool by holding the Command key if using a Mac or Control key if using a Windows computer.
You can recover objects in Photoshop after deletion if you are editing non-destructively using duplicate layers instead of the original layer. Simply delete the duplicate layer and get back to the background layer. However, you might not recover the objects after flattening the layers.
Learning how to delete objects in Photoshop can help you remove spots and elements that might clutter the photo. You can delete the objects using the Content-Aware Fill, Spot Healing Brush, Patch tool, or the Clone Stamp tool, depending on the complexity and size of the objects you are deleting.


