PFRE-Logo-white-bg
Reading
blue-triangle-element

Articles

PFRE is the original online resource for real estate and interior photographers. Since 2006, it has been a community hub where like-minded professionals from around the world gather to share information with a common goal of improving their work and advancing their business. With thousands of articles, covering hundreds of topics, PFRE offers the most robust collection of educational material in our field. The history of real estate photography has been documented within these pages.
All Articles
blue-triangle-element

Latest

Image banner for the November 2023 PFRE Photographer of the Month Winner Javier Sotomayor, with a featured image of his winning photo titled "Open"

Congratulations to Javier Sotomayor, November 2023 PFRE Photographer of the Month! The theme this month was "Open." Javier Sotomayor - Entry #879 Dave Koch - Entry #877 Peter Wingfield - Entry #874 Here's what Javier has to say: Hello First of all I wa ...

Contest
blue-triangle-element

OVERVIEW

For over a decade, photographers from around the world have participated in PFRE’s monthly photography contests, culminating in the year-end crowning of PFRE’s Photographer of the Year. With a new theme each month and commentary offered by some of the finest real estate & interior photographers anywhere, these contests offer a fun, competitive environment with rich learning opportunities. 

Contest Rules
blue-triangle-element

CURRENT CONTESTS

View / Submit
blue-triangle-element

PAST CONTESTS

View Archive
Resources
blue-triangle-element

Resources

PFRE prides itself on the depth and breadth of the information and professional development resources it makes available to our community. Our goal is to help real estate and interior photographers be successful while bringing the community together and elevating the industry as a whole.
blue-triangle-element

Conference News

No items found

How to Reformat an SD Card

In: 
Published: 28/10/2022

As an Amazon Associate we earn from qualifying purchases.

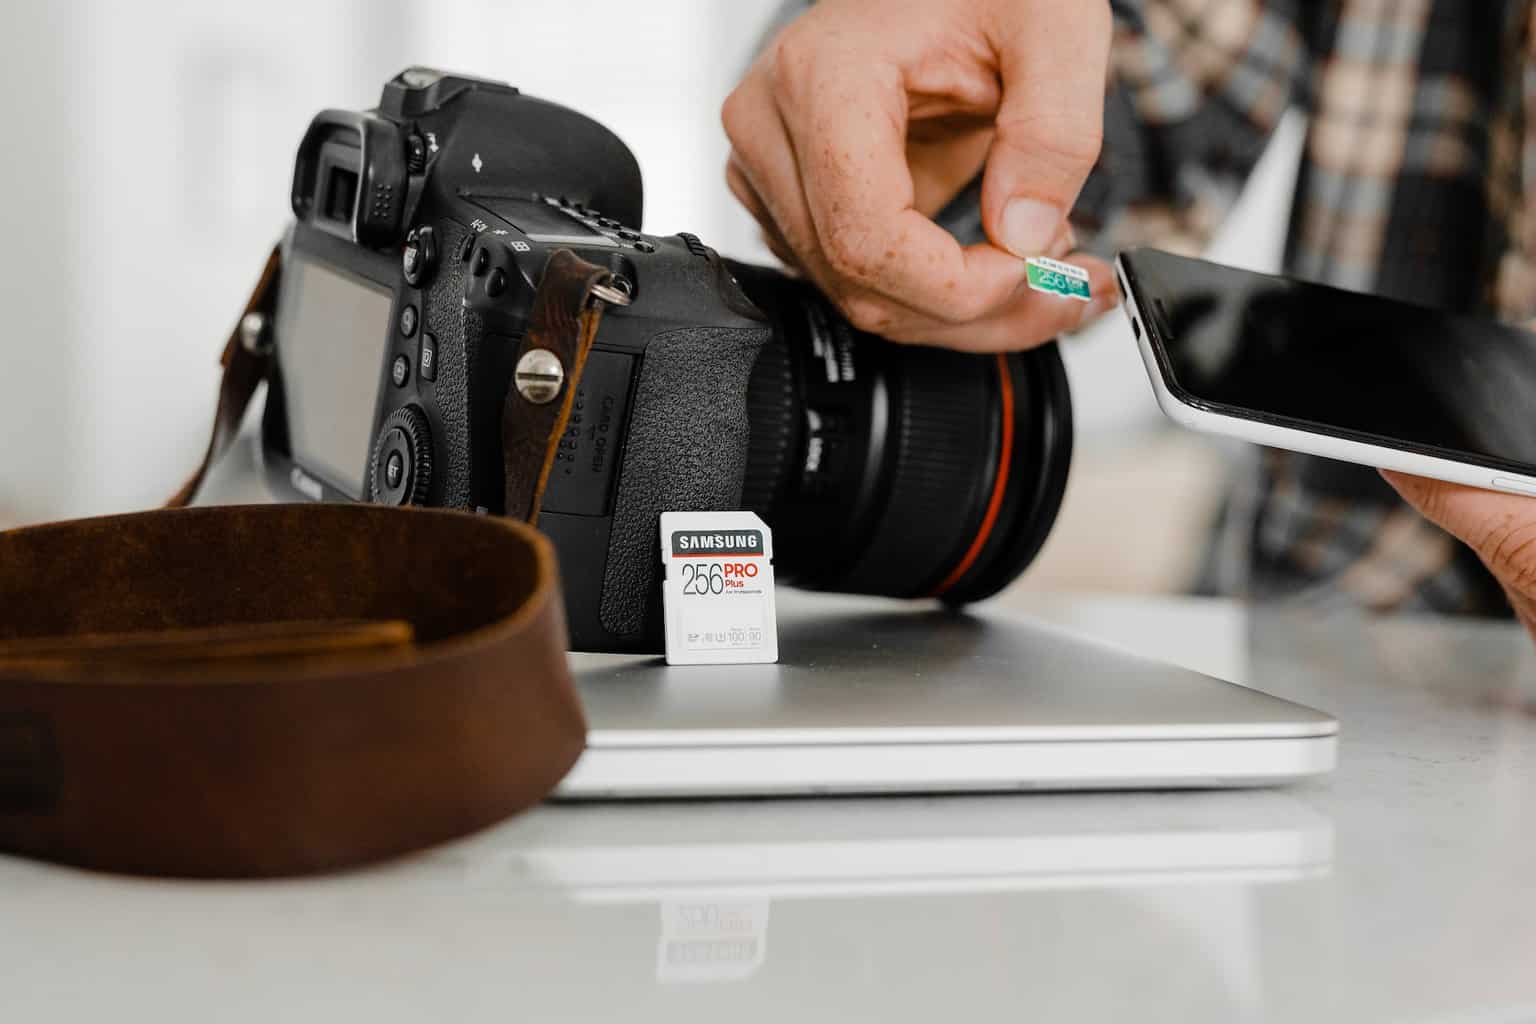
Knowing how to format your SD card is essential for a real estate photographer. Doing this enables you to store high-quality images without storage space hassle. If you’re wondering how to reformat an SD card, I’ve got you covered. You’ll find all the steps for doing this below.

How to Reformat an SD Card

Depending on your device, there are several options for re-erasing an SD card. These methods work for a wide range of storage cards. It is also ideal for cards that have been erased more than once.

A person holding an SD card and smartphone while a silver laptop and black DSLR camera are on a white table

One of the options you have for formatting your card is right from your camera. You can apply this method in some steps via the quick menu option. Besides, you can also erase your SD on a Mac using the mac finder, and on windows via File Explorer.

Below, I’ve discussed the different approaches to use depending on your device:

How to Reformat an SD Card on a DSLR Camera

Knowing how to format your SD card right from the camera will make you more productive. Besides, it protects you from inserting your card on a third-party device. Putting your SD card on an external device can slow down the device’s performance. It can erase all the files on it.

Here are the steps you need to take to reformat your SD card right from the comfort of your camera:

  1. Start by switching off the camera
  2. Next, insert the SD card into the card slot usually on the right side at the bottom of your camera
  3. Turn on the camera and navigate to the “Menu” option on the screen. You can also access the “Menu” option by clicking on the “G” or “Q” button, depending on your camera
  4. On the menu screen, find the option labeled “SETUP” and click on it
  5. Then, select the “Format” option displayed from the dialogue menu
  6. Click OK to confirm this setting
  7. Lastly, turn your camera off and on again

Note: Make sure to charge your camera full because formatting could take a while depending on the number of images you have on it. Besides, ensure that you’ve carefully backed up your files to prevent permanent loss of your client's work.

Reformatting Your SD Card on a Canon DSLR

The steps to erasing your SD on a camera are quite similar for most DSLRs. However, there’s a much easier approach on a Canon. You can format your entire SD card on a Canon in just four simple steps. Below, you’ll discover the steps you need to take:

  1. Tap on the quick menu button “Q” on your camera
  2. Select the multi-controller and navigate to Camera Setting 1
  3. Then, click on the “Format Card” option
  4. Click on OK to confirm these settings

Note: Depending on the number of images you have on the card, formatting can take several minutes to a couple of hours. So, make sure you charge your camera fully before proceeding.

A person holds an SD card while a silver laptop and DSLR camera is on a brown wooden table

How to Reformat an SD Card on Windows

If you’re using a windows computer, you might prefer using it to format your SD card. It offers more flexibility and a wide range of formatting options. There are several tools and features on a PC for erasing all the files on your computer, an example is File explorer.

To erase your SD card using file explorer, here’s what you need to do below:

  1. Switch on your computer
  2. Then, insert the SD card into the card reading slot usually by the right side of your computer
  3. After inserting the card, open the file explorer function on your home screen
  4. From the display menu, select “My Computer” or “This PC” depending on your computer version
  5. Select the option titled SD card from the list of functions displayed on the menu
  6. Next, select the option titled “Manage” on the top left corner of screen
  7. Click on the “Format” option which displays a new drop-down menu at the centre of the screen
  8. Go to the option titled “File Systems” and select the display menu below it
  9. From the list of options displayed, select the “FAT32” option
  10. Next, check the dialogue box titled “Quick Format” to reformat
  11. Click on the “Smart” option to proceed with erasing the card
  12. Then select OK on each subsequent screen
  13. After that eject the card from your computer, and you’re good to go

Note: While you’re on the Format drop-down menu, you can also select the NFTS option if you want to use this SD card only on your windows computer. Apart from that, you should also choose the ‘FAT32” option. It allows you to use your card across multiple devices.

How to Reformat an SD Card on a Mac

You can also erase your MAC computer's SD card without hassle. The steps for formatting your SD card on a Mac follow the same pattern as a window. However, in this case, you’ll use the Mac finder to locate the SD card after inserting it.

Here’s a detailed step-by-step guide to going about that:

  1. Switch on your Mac computer
  2. Insert the SD card into the slot usually on the left side of your computer
  3. Navigate to the finder menu and select the “GO” option
  4. Then, click on the button titled “Utilities”
  5. After that, click on another button titled “Disk Utility” which displays a new menu with different options
  6. On the menu, navigate to the “External” button and click on the SD card option right below
  7. Next, go to the top middle part of the screen and select the option titled “Erase”
  8. Then, select the “Format” button which displays a new menu option on your computer
  9. From the menu, click on "MS-DOS (FAT) if you’re using 32GB computer memory or less. Otherwise, click on the "ExFAT." option for a computer with larger storage
  10. After that, select “Erase” to format the card

Note: Before erasing the SD card, ensure that you’ve backed it up properly so as not to lose your files for life. You should also make sure that your computer is plugged in during this process to avoid disrupting it due to a power outage.

A woman using a silver laptop and holding an SD card near a black DSLR camera on a bedsheet

How to Reformat an SD Card on an Android

Formatting an SD card on your smartphone is the easiest approach. Besides being comfortable, navigating your smartphone settings is pretty easy. Using your smartphone gives you direct access to the files you want to erase. Here’s how to go about formatting an SD card on your android:

  1. Switch off your android phone
  2. Then, insert the SD card into your device and switch it on afterwards
  3. Go to the “Settings” menu at the top right corner of your screen
  4. Navigate to the option titled “Storage” and open it
  5. From the sub-menu, select the “Advanced” button
  6. Go to the portable storage menu, and from the options displayed, select the name of the SD card
  7. After that, a menu pops up, and from it, select the “Format” option
  8. Then, click on the “Format SD card” button from the new menu displayed
  9. Now eject the SD card from your device and you’re good to go

Related Questions

What Does It Mean to Reformat My SD Card?

To reformat your SD card means to erase all the data you have on it at once. Reformatting also involves deleting your files permanently even after first formatting them. Once you format your card, a different system of file arrangement is registered on it.

Will Formatting Fix a Corrupted SD Card?

By formatting a corrupt SD card you can fix the error on it. When you format, you’re restoring the default settings on the SD card, which can remove any underlying issues. Although by formatting you’re choosing to restore the card by deleting all saved files and images.

Conclusion

Knowing how to format an SD card is a game-changer.  It gives you more storage space to store new images for your real estate clients. You can format your card on the camera, your Windows or Mac computer, or smartphone. I’ve covered all you need to know about this process.

Vendors

Rela Logo
CS6 PSE Logo
HD Photo Hub Logo
FullFrame Logo

Learning Topics

.
magnifiercrossmenucross-circle