


Congratulations to Javier Sotomayor, November 2023 PFRE Photographer of the Month! The theme this month was "Open." Javier Sotomayor - Entry #879 Dave Koch - Entry #877 Peter Wingfield - Entry #874 Here's what Javier has to say: Hello First of all I wa ...


As an Amazon Associate we earn from qualifying purchases.
Real estate
Curves can make an image easy to look at because it leads your eye throughout the frame. It is like leading your client around the property yourself and personally showing them every area of the place. The client's eyes will immediately follow the line. Curves are often graceful, they are rhythmic and dynamic and they can add energy to a picture.
Quick Navigation
The easiest and fastest way to curve a photo in Photoshop is to choose the image layer, click on Edit, select Transform, and choose Wrap. In the wrap presets that are located in the upper right corner of the settings bar, you will see the Arc preset. All you need to do is adjust the bend percentage until you are satisfied with the result.

You can choose several methods to curve an image:
I have broken down the process and discussed each of them in-depth below.
With Photoshop, you can create an illusion of liquifying a solid object in an image by turning it into rubber via bending or curving. For objects in an image, you need to use a Liquify filter or you can use the Warp tool.
You need to open the picture in Photoshop. If your image has a plain background, all you need to do is to make another copy of the image layer. The image layer is usually found under the Background layer. You need to drag it carefully onto the New Layer option which can be seen at the bottom part of the Layers option.
If the image does not have a plain background, you need to isolate the object that you wish to curve by choosing it via the Quick Selection Tool that is seen in the Toolbox. Copy and paste it so it will have its own layer. If you wish to curve a picture in Photoshop, the Warp tool works well too, and you can also use the following tool for the same effect:

Click the menu bar and choose Filter. Next, select Liquify. You need to adjust the brush size first then use the Push Forward Tool in order to push the object in the picture in any direction via smooth and even strokes.
If you end up overworking the object, which does happen especially if you are making massive bends, some parts of the object will look too thick or too thin. In order to change this, just click on the areas using the Bloat Tool or the Pucker Tool. Once the process is done and you have made all of the adjustments, choose OK.

Choose the Smudge Tool from the Toolbox so you can correct all of the bumps or grooves that are left in the edges of the object and ones that are often left by Liquify filter. Just use one short stroke that is perpendicular to the edge of the object. You can also push the pixel into the line without smudging it.
Make sure that you do not use long strokes or use too many strokes in one place as it smudges the edges of the object.
Photoshop has a Warp Tool that allows you to warp an image easily, You can select images and you can drag them to reshape them when you need to. If you want to use this method, you can do so by following the process that I've listed below.


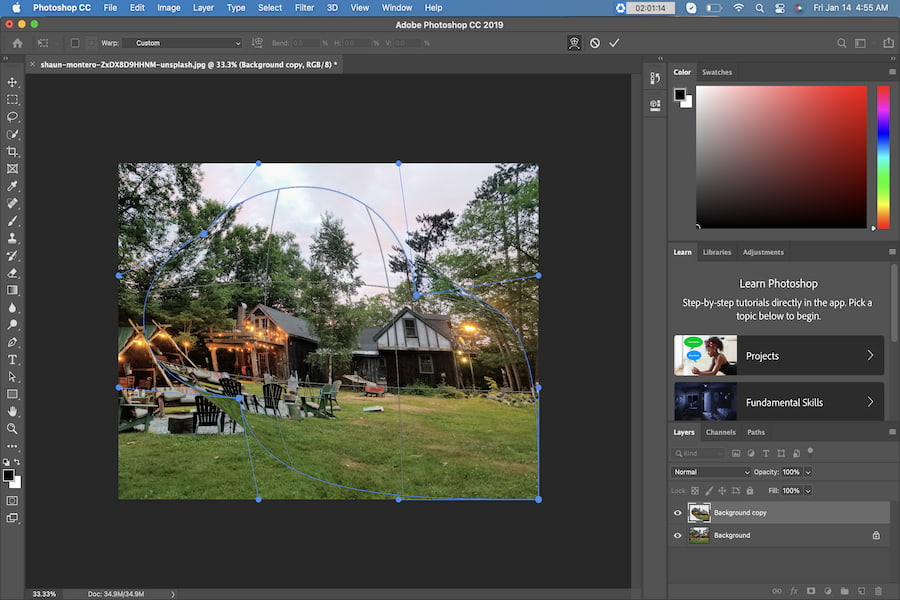
Create another image layer, or you can simply select and copy the object that you want to make an adjustment to, like what you did via the Liquify filter. Choose the Marquee Tools from the Toolbox to choose the object and select the Edit menu, then Transform, then choose Warp. A grid will be visible on the object once you’ve done this.
Clean the background of an image by using the Eraser Tool and erase the background around the object that you warped to make the layer visible. If it ends up making the un-warped object visible, you can use the Healing Brush or you can use the Spot Healing Brush from the Toolbox in order to hide the second object.
Another method widely used by photographers is bending the whole picture instead of just the object. This can be done if you wish to change the aesthetic of the whole photo.
Below is the detailed process on how to do it in Photoshop.
Open a picture to make it as the background. You can also open another picture that you wish to bend and select the Layer on the menu. Choose the Duplicate Layer then choose the background image under the Document menu.
Next, choose OK, and close the window. The picture that you want to bend will now become a layer in the background image window.

Resize the image that you wish to bend by choosing the Transform via the Edit menu. Choose Scale and drag the corner while holding the Shift key. Press Enter and choose Transform from the Edit menu again.
You can select from the following:
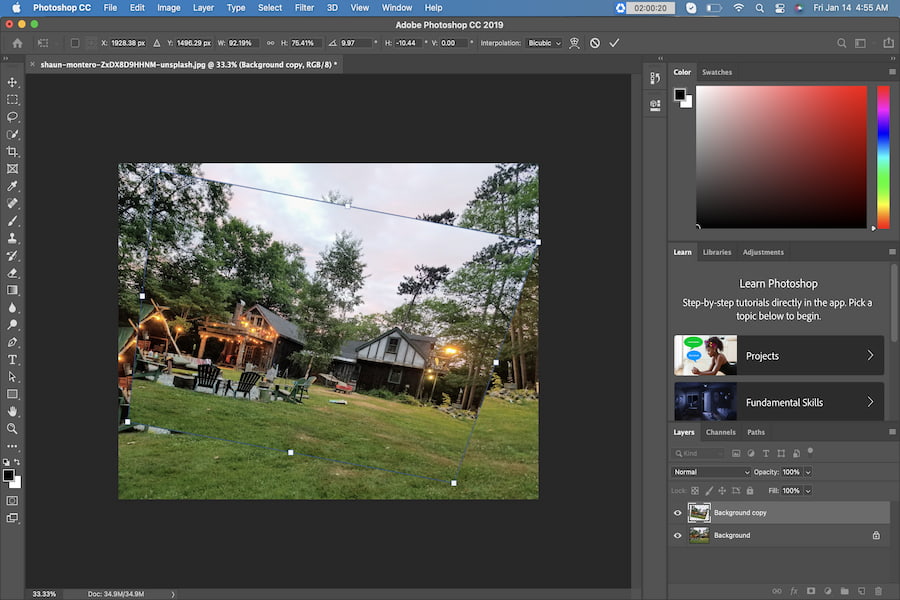
Choose the Perspective Transform option if you wish to bend the photo so it will look three-dimensional. You can go for this option if you wish to place the picture in a frame, window, or wall.
Slowly drag the corner handle in order to bend the object. Select Enter so you can save the changes.
Choose Distort or Skew Transform options so you can bend an object to a certain shape without having to be restricted to a 3D perspective. While these two tools have the same functionality, the Skew tool can slant images better. The Distort tool can stretch an image better.

Choose the Warp Transform button so you can make extreme changes and bends in an image. Drag a corner handle towards the center so that the image folds over just like origami paper.
The Curves tool is one of the most vital tools in Photoshop as it can help bring more life to your images. It can also change the contrast control of the picture and make it look professional and pleasing. Curves can make real estate pictures look more lively and it draws your viewer's in as it emphasizes every corner beautifully.


