


Congratulations to Javier Sotomayor, November 2023 PFRE Photographer of the Month! The theme this month was "Open." Javier Sotomayor - Entry #879 Dave Koch - Entry #877 Peter Wingfield - Entry #874 Here's what Javier has to say: Hello First of all I wa ...


As an Amazon Associate we earn from qualifying purchases.
Presets are one of the several intuitive features of Lightroom that speed up a photographer’s post-production workflow. Once you know their true power, you will soon find your presets panel filled with custom presets as well as those you create yourself. Learn how to organize Lightroom presets to keep everything tidy and useful.
Quick Navigation
Presets are a set of editing settings that provides an option to edit your photos with a click, giving them the exact look you want. Presets can help you do quick batch editing, as you can apply them to a large number of images simultaneously during import. In short, presets are one of the reasons why most photographers use Lightroom.
Besides importing free and purchased third-party presets, Lightroom Classic CC allows you to make your own presets. While these may be tremendously convenient in your editing process, having a lot of them may turn your presets panel into a messy, disorganized section.

If you don’t organize your presets, it will be tough to find the right one quickly, negating the whole concept of using them. Here is an in-depth guide that you can follow to build your presets panel in a coordinated manner.
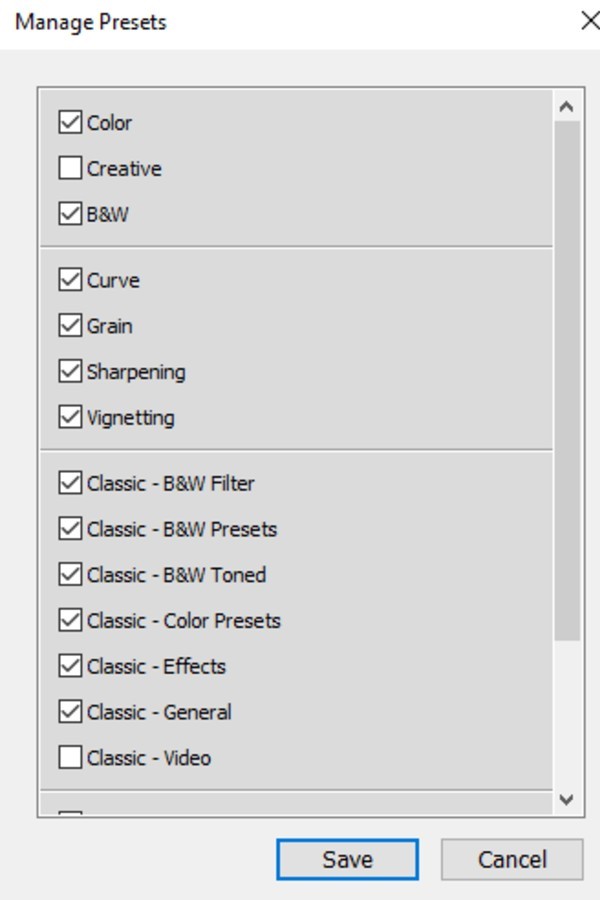
First of all, before diving into the organization, backup all your presets as a precautionary measure. You don’t want to misplace any of your favorite presets in the run.

In Lightroom, all the Develop presets are present on the left side of the Lightroom interface.
There are several default presets in Lightroom for real estate. Although they are quite useful to help you learn the ropes of applying Lightroom presets, they may seem useless once you start using custom and self-created presets.
To keep them out of the way for better organization, you can hide them and any other presets you don't plan to use.

One thing that you will frequently be doing in Lightroom is creating your own presets. In fact, using presets effective is one of many tricks to become a Lightroom expert.
Whenever you are editing a photo, it takes a lot of time and precision to set the sliders to that perfect level. If you want to edit more photos in a similar way, saving the current settings as a preset is a smart way to save time.
Here is a quick walk through the process of creating a preset in Lightroom.
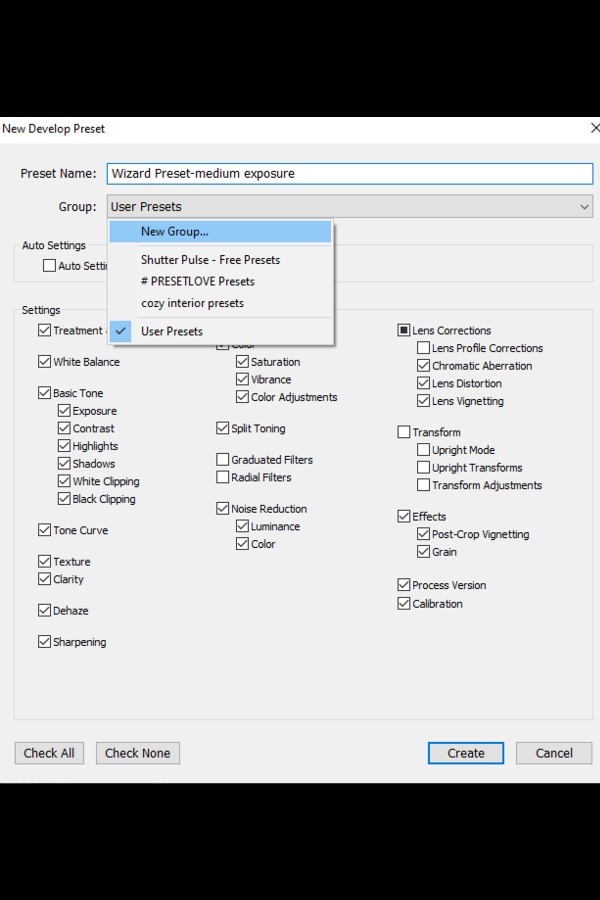
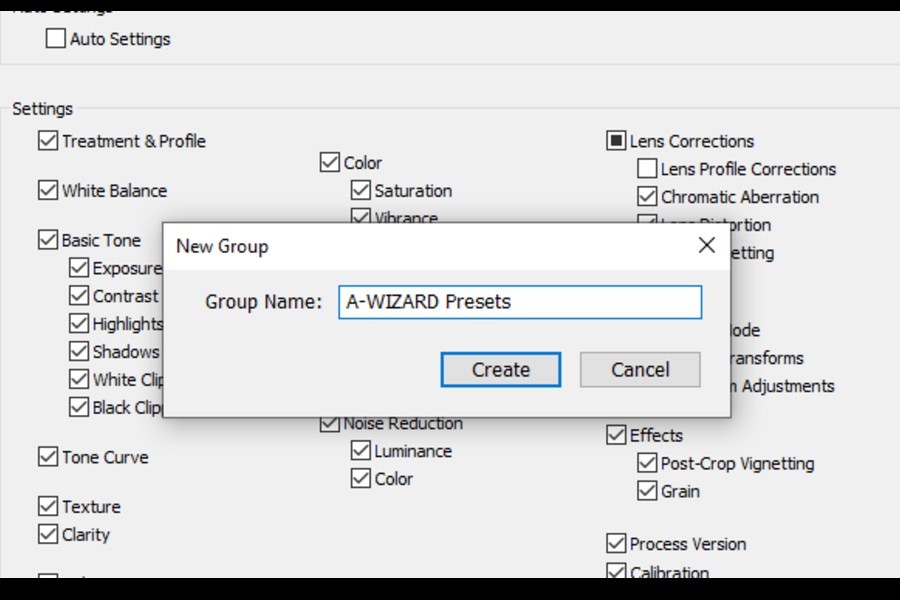
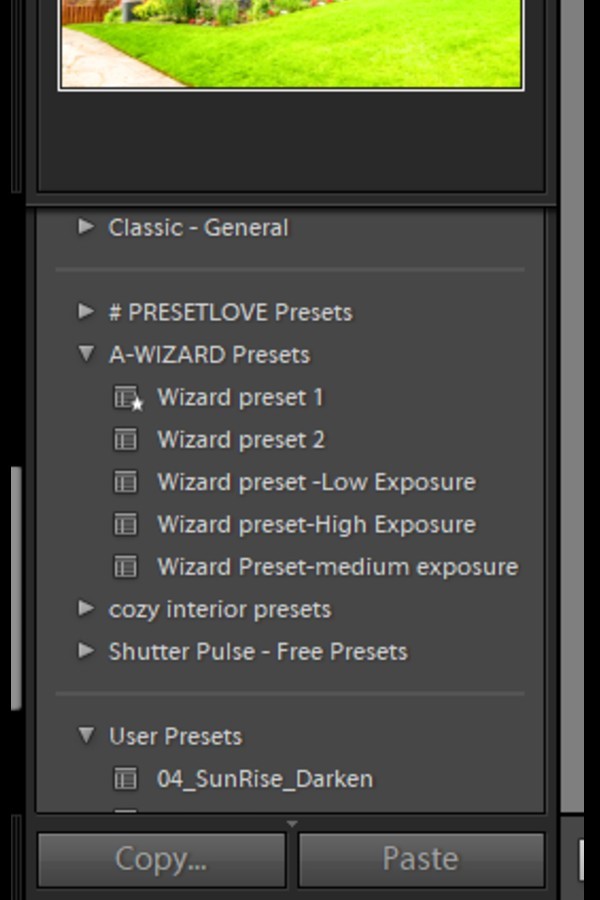
A significant part of your presets organization depends upon how you create and name your preset folders. While the option to create folders is limited to your own presets, you can move a custom preset to these folders.
Folders containing presets are shown in alphabetical order in Presets panel. Take advantage of this by naming your frequently used preset folders beginning with “A” or a number. This will create a hierarchy in the presets panel, showing the most useful presets on top.

Give meaningful names to your folders by choosing words that describe the kind of presets it holds. For instance, HDR, Landscape, Portrait, or Black and White folders are easily identified as folders having corresponding presets.
Here is a smart way to take your preset organization up a notch. If you create similar kinds of presets with slightly varying edits, you can add that as a suffix to the preset name to help you identify it later with ease.
For instance, three of my Wizard presets for exterior views of properties rectify the exposures to a certain level. Hence, the suffixes low, medium, and high exposure are added to their names.
Any presets you purchase from a seller or download for free are also placed in the same presets panel as your own presets. Typically, presets come in a bundle which will be displayed inside a folder when you import them into Lightroom. But many of them, especially the free ones, come individually.
Individual presets will be added to the panel in alphabetical order. If you have a lot of them, finding that you cannot create a separate folder to save them may be frustrating. However, there are two ways you can organize them.
You can not create a new folder to place comparable individual presets. But you can either move them into one of your own folders or the Favorites folder, which is shown on top of all the preset folders.
Apply the same principle of naming in alphabetical order or with a number to bring them up in the presets panel.
The three main advantages of a classified preset panel are:
If you don’t want to lose track of the presets you have imported, it is highly recommended to keep them organized. If you successfully put them in order, all you need to do is import an image, quickly find your desired preset, and apply it to the image for a speedy editing process.


