


Congratulations to Javier Sotomayor, November 2023 PFRE Photographer of the Month! The theme this month was "Open." Javier Sotomayor - Entry #879 Dave Koch - Entry #877 Peter Wingfield - Entry #874 Here's what Javier has to say: Hello First of all I wa ...


As an Amazon Associate we earn from qualifying purchases.
Did you know that you can make copies of an image and edit them in Lightroom? You can also export them as separate images, which lets you create multiple versions of the same photo with different effects. By learning how to duplicate a photo in Lightroom, you can take advantage of the software’s non-destructive editing process.
Quick Navigation
In real estate
Lightroom Classic’s feature of duplicating an image allows quick and easy photo processing in another way. I can create copies and use different Lightroom presets on each copy of them to select the best shot amongst them after comparison.

The editing software allows you to create as many copies of a photo as you like, besides editing and exporting each of them separately. There are two methods through which you can create duplicate versions of an image.
The first way which most photographers prefer using is to make virtual copies of your original photo. You can do this very easily both in the Library Grid or while the image is opened in the Develop Module.

Virtual copies created in the lightroom are not actual images. They are a different set of instructions for the same image. Lightroom catalog is designed to store only the editing instructions and not the source of the image.
This means that virtual copies only exist in Lightroom and don’t occupy any valuable space on disk. By default, Lightroom Classic shows virtual copies in the form of thumbnails beside the original or “Master” images. This makes it easier to find the copies when you intend to use them later.
When you make several virtual copies of an image, spotting the original one among them may be confusing. One of the easiest ways to differentiate between a master image and its copy is that the virtual copy’s thumbnail has a small page curl icon, as shown below.
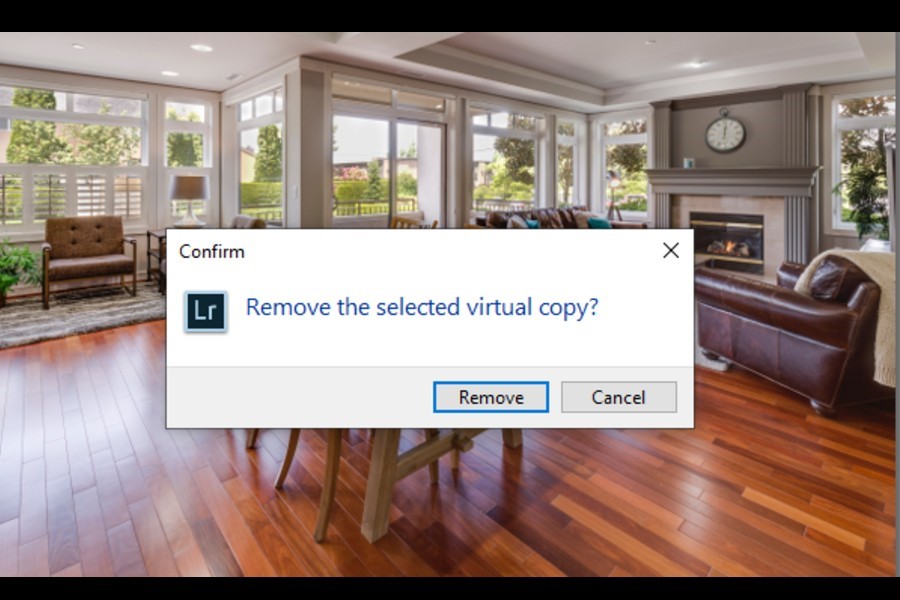
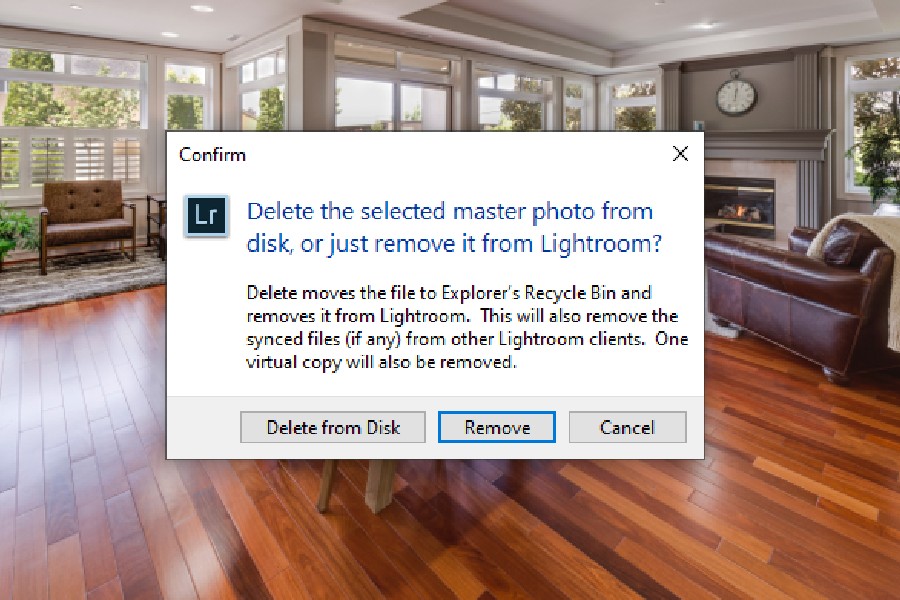
Another way to make sure which one is the master copy is to right-click on the image and click on Remove Photo. The dialogue box will appear in either way shown below, clarifying which one is the copy.
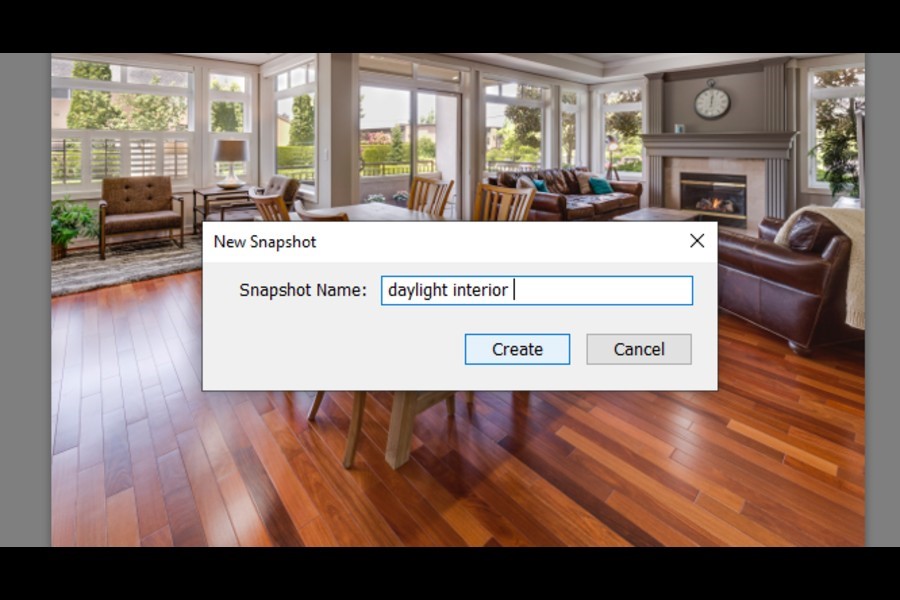
You can create snapshots on varying checkpoints in your editing process to save several versions of your photo.
One thing to keep in mind here that all the image iterations you create with snapshots won’t show in the catalog like virtual copies. Edit, click on snapshot + icon, name snapshot.

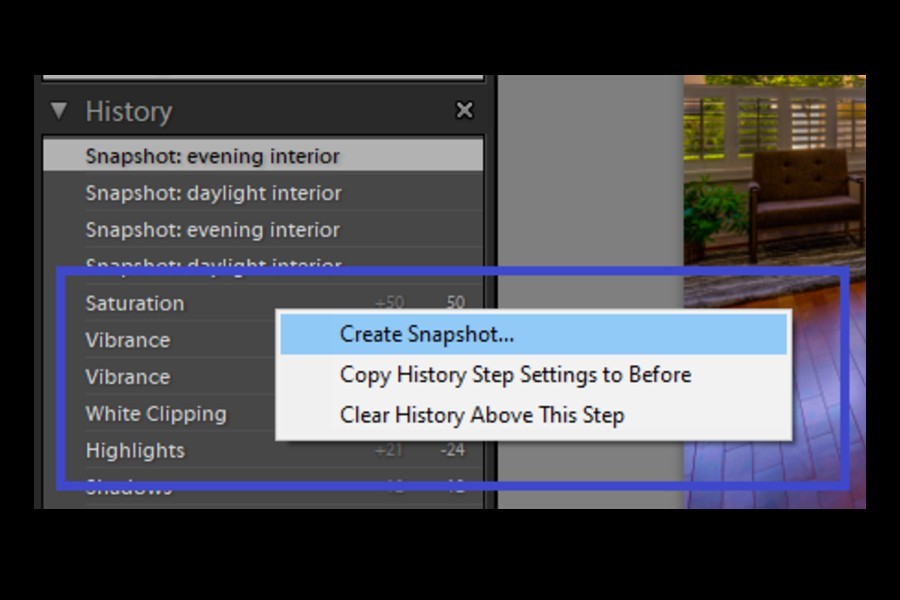
There is another way to create copies of an image using snapshots. You can open the History panel and right-click on any particular entry that you wish to save as a copy. For instance, you liked the image version while you were adjusting the vibrance, you can easily save it.
You can export the duplicates from Lightroom whether you saved them as virtual copies or snapshots.

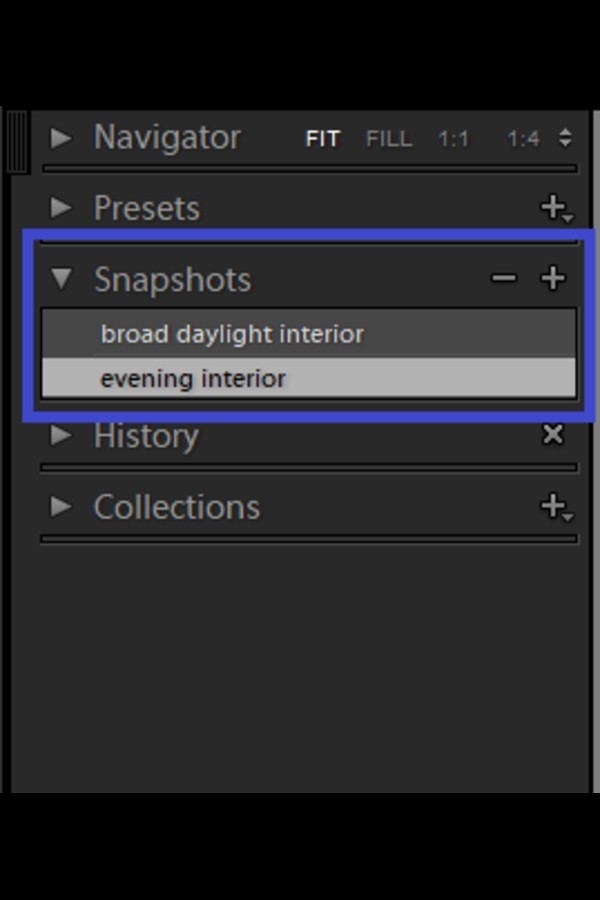
Using snapshots provides us with the convenience of quick access to a particular moment in editing history. Sometimes, while editing an image, the history gets quite long. It is difficult for us to track my liked versions from the long list of edit history.
However, the snapshots are saved with a specific name under the Snapshot panel, letting us view them quickly whenever I want. Also, the option to export the photo is also available via snapshots.
There are two types of editing software. Those that make changes to the original image are called destructive software. Once you make changes in the original image and save it, the actual image is changed forever.
On the contrary, non-destructive editing software does not make any changes to the original image but makes a preview of the image with another set of editing instructions that you make. Lightroom Classic CC is an example of non-destructive image editing software.
Among some tricks to help you become a Lightroom expert is the ability to view the original image alongside the edited one. Click the YY button (at the bottom of the image in Develop module) to see the difference between the edited and original versions. This is proof of Lightroom Classic being a non-destructive editing software.
Lightroom has two features to create virtual duplicates of the master images, Virtual Copies, and Snapshots. Both forms of image iterations exist in Lightroom and do not take up any disk space. We can use duplicates to make varying stylized versions of the image and export them later for external use.


